
How to Repair Bifold Door Top Roller Guide
If your bifold doors are squeaking and squeaking, they may need a little maintenance. They may need to be cleaned and lubricated or adjusted. The issue could be caused by an unfastened bolt on the top pivot, or by the top guide roller.
This kit contains all the hardware required to bring your bi-fold closet door system to optimal performance.
Take the door off
Installing a set of internal bifold doors might seem like an involved and difficult project but it's actually straightforward for a DIYer with a little experience. Moving the frame isn't the problem but the trick is getting the doors to fold and close smoothly and precisely. As bifold doors are complex machines, they may need some 'tuning' to continue working properly. bifold door glass replacement cost could be as simple as tightening screws or as complicated as removing the door and replacing the pivot pin or roller.
The majority of the time, you can solve these issues by making a few basic adjustments without removing the doors. You might notice that your bifold doors are sliding, scraping the floor or slipping off track. The solution to these issues isn't difficult. With three simple steps the bifold doors will be back on track in no time.
One of the most common problems that internal bifold doors face is that they are sliding out of alignment. This could be due to loose screws, holes in the anchor pins, or simply a door that isn't aligned properly. In the majority of instances, you can fix this with a few easy adjustments, however if the door isn't moving at all, it could be necessary to have it removed and replaced.
To take the door off, you'll need an screwdriver and perhaps a pair of pliers (to assist in loosening any pins on the pivot that are stuck). The screwdriver is used to disengage the locking levers on the bottom of the pivot bracket. The pliers are used to remove the pin.
After the top roller is loose, you should be able to raise the door and swivel it downwards in order to lift it out of its track and pivot brackets. This is usually quite straightforward, but be careful not to let the door hit against the door frame. You'll then be able to cut off the edge of the door which is scratching the floor, and sand it down until it's smooth. Then paint or refinish the door as required.
Remove the Roller Guide
This spring-loaded roller guide is mounted on the top of a bifold door to help in smooth operation. It is specifically designed for Kenna frames, and will fit door panels from 1 inch to 1-3/8 inch thick. It is constructed of steel, nylon and plastic components and can replace a damaged or worn-out guide.
To begin to remove the guide roller, take out the screws that hold it in place by using a screwdriver and a bit to loosen it. Use your hands to carefully lift it off the frame. This might take some effort, so you should have an assistant help you keep the door in place while you remove it.
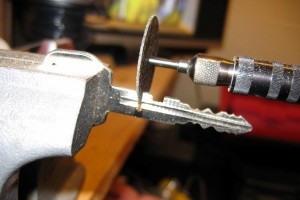
After removing the old guide, carefully cut off the remaining finishing on the foot of the guide by using a razor to cut it from the blank rod. This will make it easier to remove and will ensure that there is no damage to the new guide foot. Be cautious while doing this because the foot is extremely sharp and could potentially cut or snag your fingers.
You may have to use some force to remove the guide, but you must be careful not to chip or break the foot. Once you have separated the guide from the rod blank, make sure to remove all of the epoxy and threads remaining in the area the guide was attached. This will help prevent any future problems with the guide.
After removing the guide, test your replacement by placing it in its permanent position. Apply a few rotations with masking tape or guide tubing in order to hold it in position. This allows you to double check the alignment of your guide and spacing to ensure everything is set up correctly. This is vital to avoid any issues in the future regardless of whether you are using the CRB Spine Finder & Deflection System or eyeball it.
If the guide is set correctly and functioning according to its intended function the next step will be to reinstall the door in place. Make sure to replace and tighten any screws or pins that you removed or loosen.
Remove the Bottom Pivot
Bifold doors are a beautiful addition to any home, but sometimes they require some tweaking or adjustment to remain in top shape. Some issues can be resolved by keeping the doors in place. Other issues will require the doors be removed. This guide will teach you how to remove the internal bifold door pins, rollers, and pivots.
The first step is to gather your tools. You will save yourself some frustration by assembling all the tools you need in advance. You'll also need an plier and a screwdriver. A set of basic tools can be bought at a reasonable price from a local hardware store. It's also a good idea to have some wood glue handy. This can be useful when you need to fix any of the rollers back in place.
Once you've gathered your tools, begin by opening the bifold doors. Then, you'll need to loosening the top track bracket with your screwdriver. Once the bracket is free, you'll be able to slide the door off the top track. It might take a small amount of jiggling, but it should be able to pop right off the track.
Next, you'll need to remove the pivot at the bottom from the frame. It is best to do this from the outside of your home, so be sure to shut any interior doors you have open. This will be much easier than working from inside. If the track at the bottom appears to be in good condition it is possible to raise the door to remove the track.
You will need to replace the track if it's damaged. Hardware stores sell replacement tracks for bifold doors, as well as swinging closet doors. If the track is seriously damaged, then you might need to replace it entirely.
It is now time to check your doors for their proper operation. Make sure that they are capable of moving smoothly in and out of position. You'll want to ensure that the edges of your door are parallel to the frame when it's closed. If they're not, you'll need to adjust the top pivot bracket and tighten or loosen the bottom setscrew until the door's edge lines up perfectly with the frame.
Replace the Roller
Bifold doors neatly enclose closets, laundry nooks and pantries, but only when they work properly. They consist of two door panels that hinge together and open up on the track that is located at the top of the frame. Over time the guides for the rollers can wear out and cause the doors to slide. The roller guide can be replaced in a matter of minutes with basic tools.
The first step is removing the guide roller from your door panel. The bolt that holds the bottom pivot is to be removed, as well as the screw that connects the guide to the top of the door panel needs to be loosened. After removal of the guide, pull the panel out of the track. Then with a wrench, remove the top pivot bolt from the hole in the header of the frame by loosening the bolt.
Stanley, Cox and Acme offer a replacement top nylon roller that has a 7/8-inch diameter wheel on a steel base. It mounts on the top of the bifold door, which is 1 to 1-3/8 inches in thickness and is spring loaded to self-adjust the upper track to ensure smooth glide.
Another issue with a bifold door is that it scrapes the floor when it opens or closes. This can happen after adding carpet, or other flooring materials which require the doors to be elevated to allow for clearance. This issue can be resolved by getting rid of the screws that adjust the bottom pivot and loosening the top track mounting screws and moving the anchor/pivot.
A new set top roller guides is a cost-effective solution to your bifold doors becoming difficult to operate. You can usually find them at your local hardware store in the door section but they're also available on the internet from a variety of sellers. In addition to a new top guide for rollers, you'll need a small container of Elmer's wood glue that is sold in the big box stores and a squeeze clamp. The clamp is used to keep the area being repaired sealed after the glue has been installed and dried.